Monday, August 24, 2015
Sunday, August 23, 2015
Saturday, August 22, 2015
Texturing and Exporting to Maya
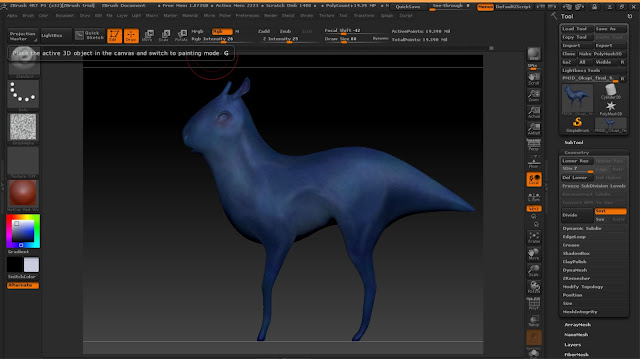
I poly painted my model in Zbrush, created UV map, Texture map, displacement and normal maps then exported him into Maya.
Building up paint layers.Exported to Maya, low res model.
Render view. He has funny triangles on his face... It had to be his face...
Jesus Christ. I found this way funnier than I should have.
I need to fix this! I'm asking my Animation facebook page now.
Friday, August 21, 2015
UV Mapping in Headus
I struggled with the poly painting in Zbrush because it wouldn't let me keep the low res model once I divided it to give it a more detailed poly paint. I went on our Animation facebook group and asked what I should do.
I got told to UV map my Maya model and then bring it to Zbrush so it could divide without losing the low res model. It worked!
I UV mapped my model in Headus, saved as a OBJ and imported into Zbrush. Here I can add more detail and divide my model all I want to paint. Then later I can project the high res model onto the low res one in Maya for animation!
Thursday, August 20, 2015
Polypainting and Normal Maps etc
Because I retopologised my character in Maya I had to bring him back into Zbrush to add more details and paint him. When I exported him back into Zbrush he had a high and low res. But when I tried to polypaint him (in high res) the brush strokes were very blurry. I saw a tutorial that suggested dividing the model then painting him. I wanted to avoid dividing my model because then it won't be animation friendly.
I could only get nice brush strokes if I divided my model but that meant he was too high res to put back into Maya again. I'll need to research into this and find another way of polypainting him and exporting him properly.
Quick test polypaint to test normal polypainting and polypainting on a divided model.
Retopologising in Maya
Because the Zremesher wasn't going well I decided to fix the mesh up in Maya.
The lower res model I could take over to Maya. Any lower and it would just be a mess...
Before retopology
After retopology... Took forever.
The lower res model I could take over to Maya. Any lower and it would just be a mess...
Before retopology
After retopology... Took forever.
Wednesday, August 19, 2015
Researching into exporting back into Maya
Drawing onto the model guides for the seams.
Red means avoid area. Blue means attract seams to that area.
Practice seams.
Unwrapped to scare you...
Quick polypaint to test exporting to Maya
Beautiful.
Storyboard Finalization
We discussed in class how our stories would all fit together. We decided at the end of my segment that my Okapi character would get himself knocked out.
Final Storyboard:
Final Storyboard:
Tuesday, August 18, 2015
ZRemesher
I looked into retopologising with Zremesher.
This is without the settings being touched.
I played around with the settings so I could achieve edge loops but it was more hassell than it was worth.
I couldn't figure out how to retopologise around the eyes.
This is without the settings being touched.
I played around with the settings so I could achieve edge loops but it was more hassell than it was worth.
I couldn't figure out how to retopologise around the eyes.
Changes to Model
After talking about my model with my tutor she gave me some feedback on my character.
Changes to Make:
- Smaller mouth
- Tail shorter and fatter
- Bigger chest
- Smaller belly
- Higher lower back, lower top spine
- Lower legs less realistic/more stylized like in character drawing
Now time to retopologise...
Monday, August 17, 2015
Sunday, August 16, 2015
Modeling my Character Cont:
He's so unco looking at the moment. I forgot I need to add in an open mouth so I added that in... Looks great...
Just for your nightmares.
Drawing on what needs to be fixed on a screenshot of him. Its helping a lot so far.
Reference for sculpting the body.
Oh dear.
I just need to sculpt around the eyes
Just for your nightmares.
Drawing on what needs to be fixed on a screenshot of him. Its helping a lot so far.
Reference for sculpting the body.
Oh dear.
I just need to sculpt around the eyes
Wednesday, August 12, 2015
Finalization of Colour and Characteristics
After a class discussion, we decided to make the okapi character a light blue and his tail not too fluffy/hairy. I decided to look into blue coloured creatures for inspiration. I instantly thought of Avatar.
I want to focus on the animal patterns on my Okapi creature and use different shades of blues to help it create interest. I like the touch of red on the creature (bottom left) - I'm interested in playing with this idea but I'd have to discuss with my tutor.
I want to focus on the animal patterns on my Okapi creature and use different shades of blues to help it create interest. I like the touch of red on the creature (bottom left) - I'm interested in playing with this idea but I'd have to discuss with my tutor.
Subscribe to:
Comments (Atom)


